Friday, March 26, 2010
Keagan Stewart
I just wanted to let you all know that I had my baby! Go to my other blog to see pictures and read the story!
Saturday, March 13, 2010
How To Make An Easter Egg Wreath
My husband was so excited about the way our last wreath turned out, that he decided to make an Easter Egg shaped one. We did this one a little differently though.
You'll need about 3 feet of wire, the same amount of pipe insulator, and some electrical tape. You'll also need about 3 spools of ribbon. I used double sided ribbon, so that I only needed 3, but it was really like 6 colors. You'll also need a glue gun with plenty of glue! Sorry I don't have a picture of the things you need, but I'm sure you understand everything so far!
Bend your wire into the shape of an egg, and tape the ends together so that it stays that shape.


Next, wrap your pipe insulator around the wire, and tape around the whole thing.

This is where I did something different. Instead of tying material around the wire, I used the ribbon. I hot glued the top corner of one side, pulled it tight across the egg and hot glued the other top corner. Then after it had dried, I pulled it tight and glued the bottom two corners. I started at the top of the egg and worked my way down.

When I was done, I used some of the extra ribbon to hide the sides where my ribbon was glued. I cut the ribbon in half and put the nice side towards the front so that it looks nicer. If you don't want to do this, just wrap your ribbon farther around the egg. That way, you'll just see the ribbon going down the side, instead of black. I cut a few of my strips to short, that's why I had to do this.

I had some trouble keeping the egg shape, so after I had wrapped my ribbon all around the edges and everything, we took an old wire hanger and cut it into strips to keep the ribbon tight and keep the egg shape.

And there ya go! Not near as time consuming as the clover, but still really cute!
Wednesday, March 10, 2010
Monkey Shoes!
Here is another pair of slippers that I made. I made some for my son too, and he LOVES them! He won't let me take them off! He has HUGE feet, but I was able to make a pattern for him, so most sizes can be ordered! Just leave me a comment!


Tuesday, March 9, 2010
Growing Up!
My baby boy is growing up! It's fun, but sad at the same time. Lately, he loves following us into the bathroom. While we're going to the bathroom... Yes. I know. Weird.
Anyway, he likes to go in with us and "talk" to us. It's really funny actually. Well, we're in the process of re-painting our downstairs bathroom. Stewart got some cool colored paint that was a mistint for SUPER cheap, so we started painting and just haven't gotten around to finish it yet. We've had the can of paint just sitting in the bathroom to remind us to finish (it hasn't really helped, but maybe one day it'll get us to kick into gear!) It sits next to the toilet, in the corner of the room. Hayden has started to sit on the can of paint while we're in the bathroom, and then wanting to wash his hands with us when we're done. It's cute. I've been wanting to get a picture of it, but I still haven't downloaded all of my pictures off of my camera, (I'm horrible, I know). I decided today that I was going to get a picture of him on my phone and even though it is just a 2.0 Mega Pixel camera, I'm going to post a picture. (That's all I've been doing for my craft pictures too. I really need to download my camera though!)
So, here's my little man pretending to go to the bathroom! (Don't worry, no one else is in the picture! I had to bribe him to get him to sit on the can without one of us on the toilet!)

So cute, huh?
And this one I just thought was cute. See his adorable hair? It's super long, but so curly!

Anyway, enjoy the pictures! Sorry they're such poor quality!
Friday, March 5, 2010
How To Make a Clover Shaped Wreath
I decided that I would put a cool tutorial up here for you all. This is something that I came up with the idea, and my WONDERFUL hubby made it happen for me! So without further ado.... How To Make a Clover Shaped Wreath!


What you'll need:

Just over 1 yard total of matching fabric. (I used 3 different fabrics and needed just over 1/3 a yard of each.) Sissors, electrical tape.

A picture of a clover that you like, so you can imitate it.

About 6 1/2 feet of 40 gauge wire. (We used copper wire)

Plumbing pipe cover. Cut it in half long ways.
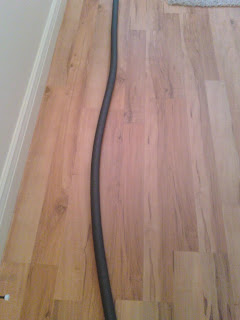
Start by bending your wire to the shape of clover you like. (This is where my amazing husband came in! He did that and the next step for me!)
Then wrap your wire clover with the plumbing pipe you cut in half and cover it with electrical tape. It will look like this when you're almost done:

My husband did that part too. I held the wire apart a little bit for him, so that we could get the tape everywhere. At the end of the stem we wrapped each wire individually then wrapped tape around them both so that it was thicker than the rest of the clover.

It should look something like this when you're done wrapping it.
I had my local material store cut my material at 1/3 yard each, and then ripped them into 1" wide strips. They were really long, so we cut each piece in half length wise. It made them about 6-7" long each. I got almost done with mine and ran out of material (so upsetting!) and had to go get some more, unfortunately where I went would only cut the material at 1/8, 1/4, or 1/3 lengths, so I had them cut it at 1/4. I then measured a length of one of my original pieces and cut the new ones to be the same length.
Then, I just tied each piece onto my clover form, for the stem, I faced the ties out toward the front, and for the rest, I faced the ties out towards the edges, so that the inside was smooth and you can see all of the curves of the leaves.
And the end product?

Yay! Super cute and original! I'm putting a piece of material on the back of one of the leaves as a hook to hang it from. I'm way excited about it! If you want one, just let me know, and I'll totally make one for you! It took a long time to make, but I think it was worth it!
Wednesday, March 3, 2010
Slippers/Baby Shoes
UPDATE: I've decided on a price! $8 per pair plus shipping. I think that is a good price, just let me know if you're interested!
I know I've seen pictures of these floating around the blogosphere, but I've decided to make some too! Yay!


I'm really proud of them, and think that they are really cute. I've made 3 pairs (the 3 you see above), and I've used different material everytime. So, they are really versitle. I'm figuring out a price still, but I'm totally taking orders! Just leave me a comment with your e-mail address, and I'll contact you to find out what size, colors, material, etc you want. I'll update this post too as soon as I figure out what a good price is for them too!
I know I've seen pictures of these floating around the blogosphere, but I've decided to make some too! Yay!


Thanks! I'm looking forward to hearing from some of you! (hopefully!)
Subscribe to:
Posts (Atom)